Table of Contents
- Roof Inspection for Insurance Claims: What You'll Need Before You Start
- Step 1: Review Your Insurance Policy and Coverage
- Step 2: Spot the Signs of Roof Failure for Insurance
- Step 3: How to Document Roof Damage for Insurance
- Step 4: File the Claim: The Roof Damage Insurance Claim Process
- Step 5: Meet the Insurance Adjuster on Site
- Step 6: If the Claim Is Denied or Underpaid: Your Appeal Options
- Step 7: Repair vs. Replacement: What to Do After the Claim
- Frequently Asked Questions
Last Updated: October 7, 2026
Roof Inspection for Insurance Claims: What You'll Need Before You Start
A roof inspection for insurance claims is the documented evaluation of your roof's condition that supports a storm or hail damage claim.
Most homeowners wait until a leak shows up inside the house, by then, the damage has been growing for months.
Below, we'll walk through seven steps, from reviewing coverage to deciding between repair and replacement, so you can file a claim that holds up and avoid paying for a new roof you don't need yet.
Your Pre-Inspection Checklist
Gather these before you do anything else:
- Your homeowners insurance policy and declarations page
- A smartphone or camera with good resolution
- Binoculars for ground-level viewing
Step 1: Review Your Insurance Policy and Coverage
Read your policy before you file anything. Most homeowners policies cover sudden storm damage but exclude age and normal wear.
Look for these key terms:
- Dwelling coverage (Coverage A): pays to repair or replace the roof structure
- Actual Cash Value (ACV): pays replacement cost minus depreciation
- Replacement Cost Value (RCV): pays the full cost to replace, once work is done
The ACV versus RCV difference matters more than almost anything else: an ACV policy pays the depreciated value of a 15-year-old roof, often far less than replacement cost.
The Insurance Information Institute's guide to homeowners insurance explains how depreciation is calculated and why it shrinks your payout.
Step 2: Spot the Signs of Roof Failure for Insurance
Storm damage and age damage look different, and insurers treat them differently. Telling them apart protects you from a denied claim.
Signs of storm damage include:
- Missing, cracked, or torn shingles in patches
- Bruised or dented shingles that feel soft
- Granules collected in gutters after a storm
Signs of wear and age include:
- Shingles that are thin, brittle, or curling at the edges
- Granule loss spread evenly across the whole roof
- Cracking in straight lines along shingle edges
Storm Damage vs. Wear and Tear
Storm damage usually hits in patterns. Hail leaves dents in a scattered but concentrated area. Wind tears shingles from one slope and leaves the rest untouched. Wear and tear shows up evenly across the whole roofing system.
That distinction is the single biggest reason claims get denied. If your adjuster decides the damage came from age, the claim fails.
Step 3: How to Document Roof Damage for Insurance
Good documentation is the backbone of a successful claim. Insurers approve claims they can verify, so treat photos and notes like evidence.
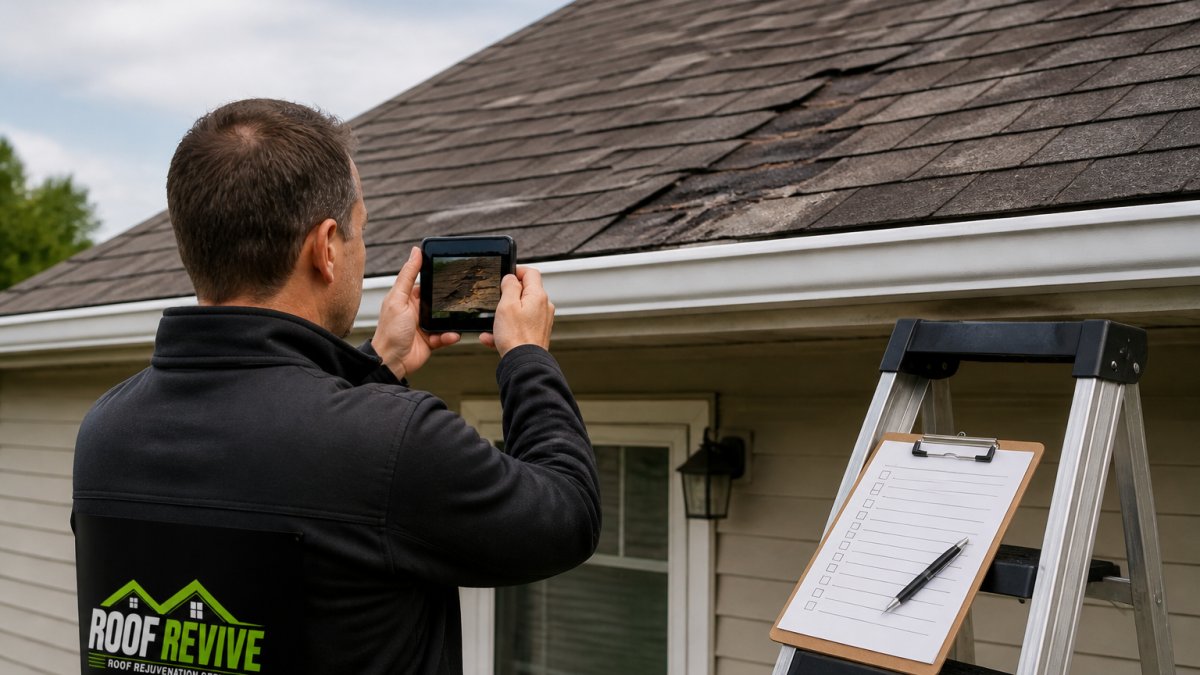
Here's how to document roof damage for insurance:
- Photograph every slope of the roof from the ground
- Capture close-ups of each damaged area
- Include wide shots that show where the damage sits on the house
- Note the date, time, and weather for each photo set
- Save receipts for any emergency repairs, like tarps
- Keep a written log of every call and email with your insurer
A professional inspection report carries more weight than homeowner photos.
Step 4: File the Claim: The Roof Damage Insurance Claim Process
Filing starts with a phone call or online form, but the paperwork matters most. Report the claim as soon as you notice damage, many policies set reporting deadlines, and delays give insurers room to question the timeline.
The roof damage insurance claim process usually runs like this:
- Report the claim and get a claim number
- Submit your photos, notes, and any inspection report
- Wait for the insurer to assign an adjuster
- Schedule the adjuster's on-site inspection
- Receive the claim decision and payment offer
What Happens During the Insurer's Inspection
The adjuster inspects the roof, checks the attic and interior for water damage, and compares findings to your documentation, measuring the damaged area, noting shingle type and age, and taking their own photos.
You don't have to be on the roof with them, but you do want to be home to answer questions and point out damage they might miss.
Step 5: Meet the Insurance Adjuster on Site
Being present at the adjuster's visit changes outcomes. Adjusters are busy and a roof has a lot of surface area, if you're there, you can walk them to the damage you documented.
What the Adjuster Is Actually Doing
An adjuster isn't just looking for damage, they're building a scope of loss, the itemized list of what the insurer agrees to pay for. That scope drives your payout more than the damage itself, so understanding how it gets built protects your claim.
During the visit, the adjuster typically:
- Measures each damaged slope and counts affected squares (a square is 100 square feet of roofing)
- Notes the shingle type, manufacturer, and approximate age
- Checks pipe boots, vents, flashing, drip edge, and ridge caps, the parts most likely to fail first
What they write down becomes the scope. If a slope, a vent, or a section of flashing never makes it into the scope, it usually doesn't get paid for, even if it's damaged.
How to Prepare Before They Arrive
Treat the visit like a walkthrough you're hosting.
- Print two copies of your photo log and inspection report, one for the adjuster, one for you.
- Mark your documented damage on a simple roof diagram so you can point to it fast.
- Have your claim number, policy number, and date of loss on one sheet.
- Clear access to the attic if they need to inspect interior damage.
- Write down your questions in advance so you don't forget them on the spot.
Questions Worth Asking During the Visit
- Which slopes are you including in the scope?
- Are you measuring for repair or full replacement on each one?
- How are you handling code-required items like drip edge or ice-and-water underlayment?
Get the adjuster's name, license number, and direct contact information before they leave. An independent adjuster works for the insurance company, not you; a public adjuster works for you and typically takes a percentage of the settlement. Most straightforward claims don't need one, but large or disputed claims can justify the cost.
After the Visit
Request the scope in writing within a few days of the inspection, then read it against your own documentation. If a photographed damaged area isn't listed or a line item looks short, raise it in writing before cashing any check, accepting payment can be treated as agreeing to the scope.
Step 6: If the Claim Is Denied or Underpaid: Your Appeal Options
A denial isn't the end. Insurers reverse decisions more often than people expect.
Your appeal path:
- Ask for the denial in writing with the specific reason
- Request a re-inspection if the reason is disputed
- Submit a second opinion from a licensed roofing contractor
The appraisal clause is the one most homeowners never use. It lets both sides hire independent appraisers to settle a value dispute without going to court.
Step 7: Repair vs. Replacement: What to Do After the Claim
Not every claim ends in a full replacement, and not every roof needs one. This is where homeowners lose the most money, accepting a patch that fails in two years, or pushing for a full tear-off the insurer won't fund.
The Real Decision Factors
Repair versus replacement isn't about how bad the roof looks. It comes down to a handful of mechanics:
| Situation | Best Move | Why |
|---|---|---|
| Damage isolated to one slope, under roughly a quarter of the roof | Repair | Insurer pays for the damaged section only |
| Damage spread across multiple slopes or planes | Replacement | Patching a widespread problem rarely holds |
| Shingles discontinued or no longer color-matched | Replacement (often) | A repair that can't be matched may not be approved as a repair |
| Roof is structurally sound but aging cosmetically | Rejuvenation treatment | Extends roof life without a full tear-off |
| Widespread damage plus structural rot or decking failure | Replacement | Safety and code compliance come first |
Matching, Repairability, and Why Repairs Get Denied
Two rules drive most repair-versus-replacement disputes:
- Matching: If your shingles are discontinued, a repair leaves a visibly mismatched patch. Many policies and state insurance rules treat a roof that can't be reasonably matched as a candidate for replacement rather than repair. Ask your adjuster how matching was handled in your scope.
- Repairability: Shingles that are brittle, curled, or already at the end of their service life often can't be repaired without damaging the surrounding field. An adjuster who approves a repair on a brittle roof is setting you up for a callback.
If your scope says "repair" but the shingles can't be matched or won't survive a patch, that's legitimate grounds to request a re-inspection.
Code Upgrades and Depreciation Recovery
Two line items quietly change your final number:
- Code-required upgrades: If local building code requires items like ice-and-water underlayment, drip edge, or a specific fastening pattern when a roof is replaced, those costs can often be included in the replacement scope. They usually can't be added to a repair.
- Recoverable depreciation: On a Replacement Cost Value policy, the insurer typically pays Actual Cash Value first, then releases the withheld depreciation once the work is complete and invoiced. That means the check you get up front is often smaller than the final payout, and you have to submit proof of completion to collect the rest.
Where Maintenance Fits In
A roof can be structurally sound, past its prime cosmetically, and still have years of service left. Rejuvenation treatments restore flexibility and seal granules back down, exactly what an aging asphalt roof needs, and documented maintenance can support future claims by showing the roof was cared for.
At Roof Revive LLC, our GreenSoy™ treatment is a USDA-certified, plant-derived product tested by an independent PRI laboratory.
For coastal homes in Delaware and southern Pennsylvania, salt air accelerates granule loss, so roofs age faster than inland ones, making documented maintenance more valuable, not less.
If your roof qualifies, we'll tell you. If it doesn't, we'll tell you that too.
Frequently Asked Questions
Do insurance companies require roof inspections?
Insurers often require a roof inspection before issuing or renewing a policy, and many schedule one after a storm claim. A professional inspection documents your roof's condition, age, and damage, which helps the insurer evaluate risk. For homeowners in coastal areas where salt air speeds up wear, having a recent inspection report on hand can make the renewal conversation easier and show that the roof is being maintained.
How much does a roof inspection usually cost?
Inspection pricing depends on home size, roof complexity, and whether the inspector uses drones or satellite measurements. Many roofing contractors offer free or low-cost inspections, while independent inspectors may charge a fee. Because pricing varies, ask each provider what is included, such as a written inspection report and photo documentation, before you schedule. Roof Revive provides a free inspection with a written report and photos.
What should I avoid saying to an insurance adjuster about my roof?
Avoid guessing at the cause of damage, admitting the roof is old or worn out, or saying you have not maintained it. Stick to facts: when you noticed the damage, what the weather was like, and what your documentation shows. Let your photos, inspection report, and repair estimates speak for you. If you are unsure how to answer a question, it is fine to say you will follow up after reviewing your policy.
What is the difference between a contractor inspection and an adjuster inspection?
A contractor inspection is a professional assessment of your roof's condition, damage, and repair options, often with photos and a written report you can use to file a claim. An adjuster inspection is the insurer's own evaluation to verify covered damage and estimate the payout. The contractor's documentation helps you present a clear claim, while the adjuster's findings determine what the insurer will pay.
Storm damage claims reward homeowners who document early and understand their policy before they call. If your roof is aging but structurally sound, replacement may not be your only path. Roof Revive LLC offers free inspections using satellite measurements and drones, a lab-tested GreenSoy™ rejuvenation treatment, and a 6-year transferable warranty. Book your free inspection and find out whether your roof needs replacing or just reviving.